


KLAS nach Maß
Gestalten Sie Ihre Schalterplatte
Die Vorschau dient zur Veranschaulichung. Die Proportionen entsprechen nordamerikanischen Rahmengrößen.
- 01 Ihre Größe1- bis 6-fach, passend zu Ihrer Unterputzdose.
- 02 Jede PositionKombinieren Sie Schalter, Dimmer, Steckdosen und Datenanschlüsse auf einem Rahmen.
- 03 Ihre OberflächenSechs Rahmenoberflächen aus Massivmessing, dazu die Oberfläche für Kippschalter & Drehknopf.
- 04 Letzter SchliffLassen Sie jede Beschriftung gravieren – dann fertigen wir auf Bestellung.
Unsicher bei der Oberfläche? Sehen Sie sie zuerst in Ihrem eigenen Licht.
Technik
Technische Daten & Einbau
Rahmengröße für Ihre Konfiguration, Verdrahtung und Datenblätter zum Herunterladen
Technische Daten & Einbau
Rahmengröße für Ihre Konfiguration, Verdrahtung und Datenblätter zum HerunterladenDie Größe Ihres Abdeckrahmens passt sich an die Konfiguration oben an. Öffnen Sie ein beliebiges Element für das vollständige Datenblatt oder laden Sie es als PDF für Ihren Elektriker herunter. Montageanleitungen: Schalterrahmen · Steckdosen · Dimmer.
- Back box
- Screw holes
- 83.5 mm · 3.29 in apart (top to bottom), standard inch screws
- Standard
- North American (US & Canada), 120 V
- In the box
- Solid brass plate, devices fitted, matching screws
 KLAS
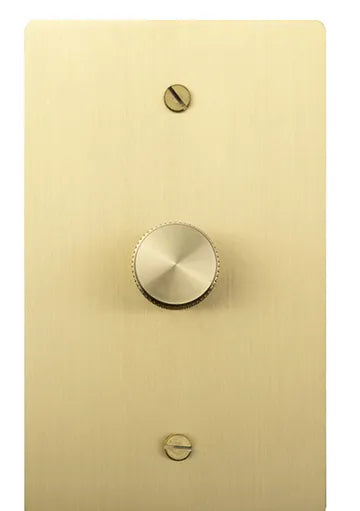
Rotary dimmers
Single-pole (grounded or basic) & 3-way · solid brass plate · knurled knob · hand-brushed, naturally unique on every plate
| Single-pole, grounded | Single-pole, basic | 3-way | |
| Use | Light controlled from one place | Light controlled from two or more places | |
| Operation | Press the knob for on/off, rotate to dim | Rotate to dim | Press the knob for on/off, rotate to dim |
| Ground wire | Yes | No (2 wires: line in, load out) | Yes (4 leads: black = common, red + red = travellers, green = ground) |
| Dimming type | Triac (forward phase) | ||
| Voltage | 110–130 V AC, 50/60 Hz | 110–120 V AC, 50/60 Hz | 108–132 V AC, 60 Hz |
| LED load | 3–150 W (dimmable LED) | 150 W dimmable LED · 150 W dimmable CFL | |
| Incandescent / halogen | 40–600 W | 40–250 W | 40–600 W |
| Rated life | 10,000+ cycles | ||
| Protection | Overheat protection · flame-retardant PC housing · 4 kV dielectric test | ||
| Neutral wire | Not required to confirm | Not required | Not required |
| Device size | to confirm | 105 × 54 × 43 mm (4.1 × 2.1 × 1.7 in), 88 g · accepts 18 AWG wire | |
| Fits | Standard 1-gang US/Canada box (per gang) | ||
| Certification | UL, US & Canada · UL file E522988 | UL, US & Canada · UL file E511941 | cULus, US & Canada · UL 1472 (solid-state dimming controls) · UL file E522988 |
| Plate | 2 mm solid brass on a 2 mm acrylic frame | ||
| In the box | Plate, dimmer fitted, matching screws | ||
Which single-pole? Both dim the same lights. The grounded dimmer also switches on and off with a press of the knob, so the light comes back at the level you left it; it suits any box, including new plastic boxes. The basic dimmer only rotates; choose it for a metal box (which grounds the plate through its screws) or to replace a dimmer in an older box with no ground wire. North American codes generally require a metal plate to be grounded; ask your electrician if unsure.

Bronze · Antique Brass · Brushed Nickel
Matte Black · Satin Brass · White
Plate sizes
* 5- and 6-gang estimated (+45 mm per gang) — to confirm
| Gangs | 1 | 2 | 3 | 4 | 5 | 6 |
|---|---|---|---|---|---|---|
| Width (mm) | 72 | 120 | 165 | 210 | 255* | 300* |
| Width (in) | 2.83 | 4.72 | 6.50 | 8.27 | 10.04* | 11.81* |
| Height | 120 mm · 4.72 in (all sizes) | |||||
| Screw holes | 83.5 mm · 3.29 in apart (top to bottom) · standard inch screws | |||||
Wiring · single-pole
Basic dimmer: same, without the ground wire to the dimmer. Ground the light fitting as normal.
Wiring · 3-way dimmer
Pair the 3-way dimmer with a KLAS 3-way toggle at the other location. For three or more locations, add a 4-way toggle in between. Use one dimmer per light circuit.
KLAS0–10V rotary dimmer · low voltage
For LED lights with 0–10V or 1–10V dimmable drivers · solid brass plate · knurled knob
| Type | 0–10V / 1–10V rotary dimmer (control signal only) |
|---|---|
| Works with | LED fittings with a 0–10V or 1–10V dimmable driver: downlights, track lights, wall washers and similar |
| Control signal | 0.5–10 V DC · up to 40 mA dimming current |
| Load | Up to 150 W of LED, through compatible drivers |
| Dimming | Smooth, stepless, 5–100% · no flicker or hum |
| On / off | Does not switch power. Pair it with a toggle (or the driver's own switching) to turn the light off. |
| Wires | Brown = DIM+ · Blue = DIM– · 13 in (33 cm) leads |
| Device size | 0.9 × 1.3 × 1.3 in (23 × 33 × 33 mm), including knob |
| Operating temperature | –15 °C to +50 °C (5 °F to 122 °F) |
| Mounting | Recessed in a standard box, or surface-mounted |
| Certification | to confirm |
| Plate | 2 mm solid brass on a 2 mm acrylic frame · sizes as for all KLAS plates (1-gang 72 × 120 mm, 2.83 × 4.72 in) |
| In the box | Plate, dimmer fitted, matching screws |
Bronze · Antique Brass · Brushed Nickel
Matte Black · Satin Brass · White
Wiring
Important
- Never connect to mains power. It connects only to the driver's dimming terminals.
- Mains power goes to the LED driver, switched by a separate toggle if needed.
- In a multi-gang plate with mains devices, keep low-voltage and mains wiring separated in the box (a divider is usually required by code).
- Check the driver is 0–10V or 1–10V dimmable; standard (triac) LED drivers won't work with it.
KLASFan speed switch
Rotary speed control for ceiling paddle fans · solid brass plate · knurled knob
| Rating | 120 V AC, 60 Hz |
|---|---|
| For | Ceiling paddle fans only · one fan per control |
| Control | Rotary, off and variable speed |
| Wires | Black = hot · White = to fan · Green = ground · copper wire only |
| Fan with a light | The light needs its own separate wiring and switch; this control runs the fan only |
| Smart fans | Not compatible with fans that have built-in smart or remote systems. Replaces a standard stepped or stepless control. |
| Fits | Standard 1-gang US/Canada box (per gang) |
| Certification | UL, US & Canada · fan-speed controls · UL file E312727 |
| Plate | 2 mm solid brass on a 2 mm acrylic frame · sizes as for all KLAS plates (1-gang 72 × 120 mm, 2.83 × 4.72 in) |
| In the box | Plate, control fitted, matching screws |
Bronze · Antique Brass · Brushed Nickel
Matte Black · Satin Brass · White
Wiring

Do not use for
- Outlets (receptacles)
- Lights, including fluorescent
- Transformers, motor appliances, or anything supplied by a transformer
- More than one fan
Using it
- Turn the dial about half a turn to start the fan (the motor needs a burst of power to start), then set the speed you want.
- If the speed suddenly drops, the dial is between steps; turn it a little further.
Installation
Turn off the breaker first. Install by a licensed electrician, following the NEC / CEC and local codes. If the wall box has no ground, cap or remove the green wire as the code allows (NEC 404.9(B), formerly 380-9(b)).
KLAS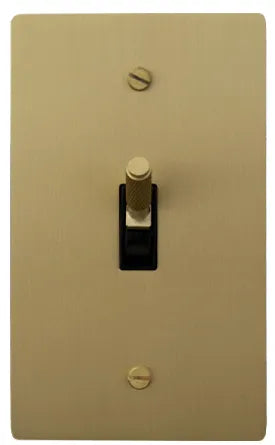
Toggle switch
Solid brass plate · knurled brass lever · hand-brushed, naturally unique on every plate
| Single-pole & 3-way | 4-way | |
| Use | One location (single-pole) or two locations (3-way) | Third or more location, fitted between two 3-ways |
| Voltage | 120 V AC | 110–120 V AC |
| Current | 15 A to confirm | 15 A |
| Neutral wire | Not required | |
| Fits | Standard 1-gang US/Canada box (per gang) | |
| Certification | cULus Listed, US & Canada · UL 20 / CSA C22.2 No. 111 (general-use snap switches) · UL file E313169 catalogue no. to confirm | |
| Switch body | Black or white (ivory to confirm) | |
| Plate | 2 mm solid brass on a 2 mm acrylic frame to confirm | |
| In the box | Plate, switch fitted, matching screws | |

Switch body options shown on satin brass
Plate sizes
| Gangs | 1 | 2 | 3 | 4 | 5 | 6 |
|---|---|---|---|---|---|---|
| Width (mm) | 72 | 120 | 165 | 210 | 255* | 300* |
| Width (in) | 2.83 | 4.72 | 6.50 | 8.27 | 10.04* | 11.81* |
| Height | 120 mm · 4.72 in · screw holes 83.5 mm (3.29 in) apart, inch screws | |||||
Wiring · single-pole
Wiring · 3 or more locations
Two locations: 3-way + 3-way. Each extra location adds one 4-way in between. Ground to every switch.
KLASOutlets
Tamper-resistant receptacles in a solid brass plate · hand-brushed, naturally unique on every plate

Duplex · GFCI · USB-A + USB-C, shown on satin brass. Dual USB-C below
| Duplex outlet | GFCI outlet | USB outlet | Dual USB-C outlet | |
| Use | Everyday sockets | Near water: kitchens, bathrooms, laundry, outdoors. Test / reset buttons | Two sockets plus built-in charging | Two sockets plus two fast-charging USB-C ports |
| Rating | 15 A or 20 A · 120 V AC. The 20 A version has a T-shaped neutral slot and must be on a 20 A circuit; a 15 A outlet is allowed on a 20 A circuit when there are two or more outlets on it. Dual USB-C: 15 A 20 A version to confirm | |||
| Tamper-resistant | Yes (TR), as required in US homes | |||
| USB ports | None | None | 1 × USB-A, 1 × USB-C · output (W) to confirm | 2 × USB-C · output (W) to confirm |
| Fits | Standard 1-gang US/Canada box (per gang) GFCI/USB depth to confirm | |||
| Certification | UL, US & Canada · UL 498 / CSA C22.2 No. 42 (receptacles) · UL file E481372 catalogue no. per device to confirm; GFCI also needs UL 943 | |||
| Device colour | White, black or ivory | |||
| Plate | 2 mm solid brass on a 2 mm acrylic frame | |||
| In the box | Plate, outlet fitted, matching screws | |||

Device colours: white · black · ivory

Dual USB-C outlet · two sockets + two USB-C ports, white or black
Plate sizes
| Gangs | 1 | 2 | 3 | 4 | 5 | 6 |
|---|---|---|---|---|---|---|
| Width (mm) | 72 | 120 | 165 | 210 | 255* | 300* |
| Width (in) | 2.83 | 4.72 | 6.50 | 8.27 | 10.04* | 11.81* |
| Height | 120 mm · 4.72 in · screw holes 83.5 mm (3.29 in) apart, inch screws | |||||
Wiring
GFCI: incoming power to LINE terminals; LOAD terminals protect outlets further down the circuit.
Installation
Install by a licensed electrician with the power off at the breaker, following local codes. Press TEST then RESET on a GFCI after installation, and monthly.
KLAS
Data & phone ports
CAT 6 network and RJ11 telephone jacks in a solid brass plate · hand-brushed, naturally unique on every plate
| CAT 6 data port | RJ11 telephone port | |
| Use | Wired internet: TVs, computers, game consoles, Wi-Fi access points | Landline phone, fax, alarm or DSL line |
| Category | CAT 6 · up to 1 Gb/s at 100 m, 10 Gb/s on shorter runs (about 55 m) | CAT 3 voice grade |
| Jack | RJ45 (8 contacts) termination type to confirm | RJ11 4 or 2 contacts to confirm |
| Wiring standard | T568B or T568A (match the other end of the cable) | USOC, line 1 on the centre pair |
| Power | Low voltage only, no mains connection | |
| Fits | North American standard: 1-gang box or low-voltage mounting bracket (per port). Back box sold separately | |
| Certification | to confirm | |
| Insert colour | White or black | |
| Plate | 2 mm solid brass on a 2 mm acrylic frame | |
| In the box | Plate, jack fitted, matching screws. Cable not included | |

Antique Brass

Bronze

Brushed Nickel

Satin Brass

Matte Black
Shown with the black insert. Mix with switches and outlets on one plate in the designer.
Plate sizes
| Gangs | 1 | 2 | 3 | 4 | 5 | 6 |
|---|---|---|---|---|---|---|
| Width (mm) | 72 | 120 | 165 | 210 | 255* | 300* |
| Width (in) | 2.83 | 4.72 | 6.50 | 8.27 | 10.04* | 11.81* |
| Height | 120 mm · 4.72 in · screw holes 83.5 mm (3.29 in) apart, inch screws | |||||
Wiring · CAT 6 (T568B)
T568A swaps the orange and green pairs. Use the same standard at both ends. Keep the twists to within 13 mm (½ in) of the jack.
Wiring · RJ11 telephone
Older cable may use blue / white-blue for line 1 and orange / white-orange for line 2.
Installation
Install by a qualified installer, following local codes. Keep data and phone cable away from mains wiring: do not share a box with power cables unless a barrier separates them (NEC 800.133). On a plate that also has switches or outlets, the data or phone position needs its own box section or bracket. Test each CAT 6 run with a cable tester after fitting.
MontageMontage Ihres Rahmens
Vier Schritte, eine Zeichnung und die vollständigen Anschlussanleitungen für jedes Element
Montage Ihres Rahmens
Vier Schritte, eine Zeichnung und die vollständigen Anschlussanleitungen für jedes ElementIhr Rahmen wird mit eingebauten Elementen geliefert. Der Netzanschluss ist von einem zugelassenen Elektriker vorzunehmen.
- 01Strom abschalten und prüfenSchalten Sie die Sicherung des Stromkreises aus und prüfen Sie die Leitungen in der Dose mit einem Spannungsprüfer.
- 02Leitungen anschließenVerbinden Sie die Anschlussleitungen jedes Elements mit Verbindungsklemmen mit der Hausinstallation, wie in der jeweiligen Anleitung gezeigt. Erden Sie jedes Element.
- 03Rahmen montierenLegen Sie die Leitungen in die Dose, richten Sie den Rahmen waagerecht aus und befestigen Sie ihn mit den zwei mitgelieferten Schrauben pro Fach. Gleichmäßig anziehen, nicht überdrehen.
- 04Strom einschalten und testenSchalten Sie die Sicherung wieder ein und testen Sie jede Position. Bei einem GFCI drücken Sie TEST, dann RESET.
Full guides with wiring tables
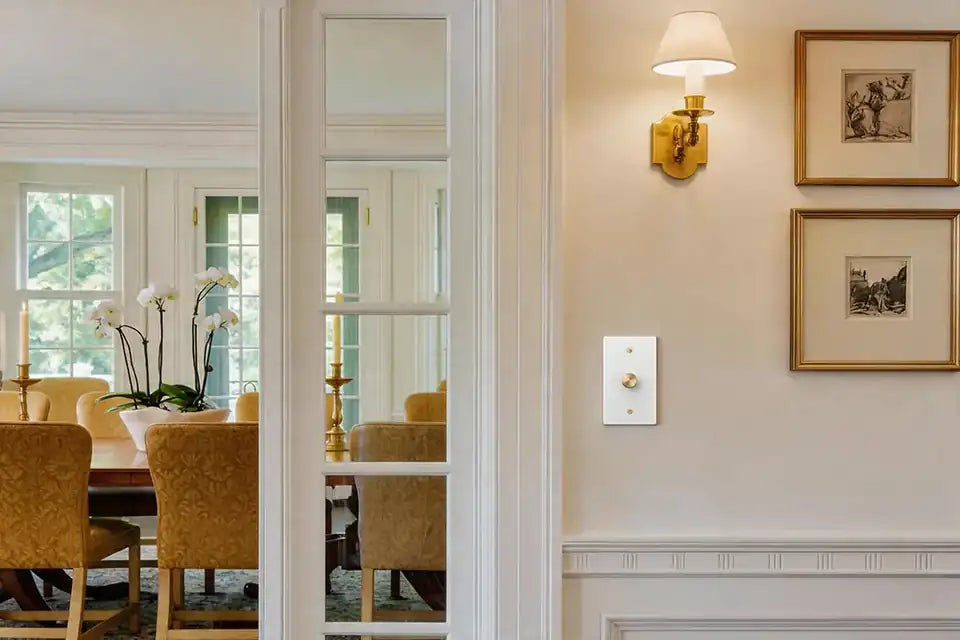
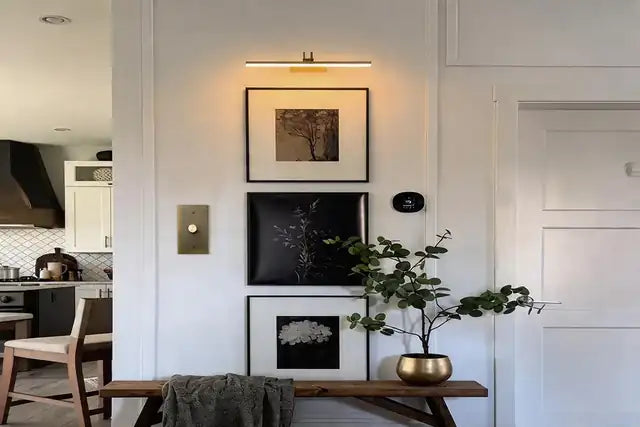
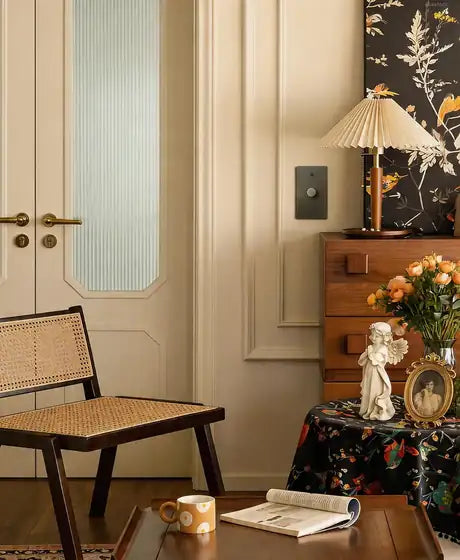
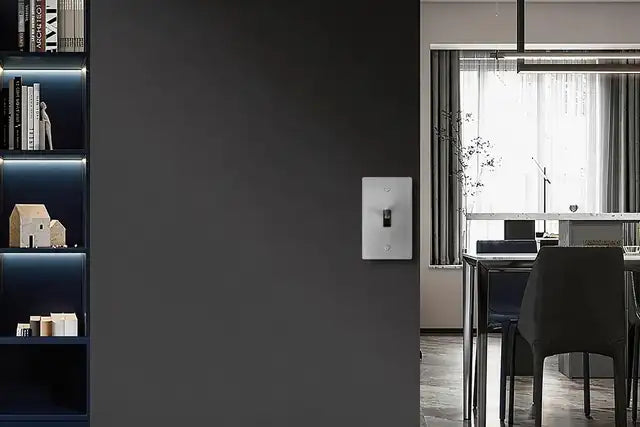
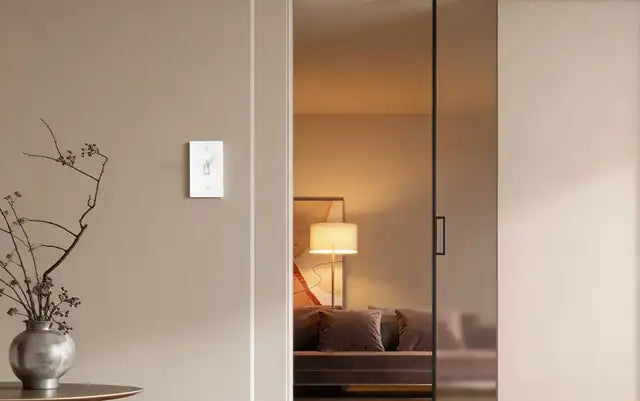
Ihre Oberfläche im Raum erleben
Echte Räume, echte Lichtverhältnisse

Das sagen unsere Kunden
- GWGord W.Verified BuyerReviewingKLAS / Brass Mixed Dimmer Switch (3-Gang)I recommend this productRated 5 out of 5 stars3 hours agoDimmer switches
Great
Product
- JHJustin H.Verified BuyerReviewingKLAS / Brass Light Switch (1-Gang)I recommend this productRated 5 out of 5 starsYesterdaySeemingly small upgrade with a big impact
Outfitted our entire house in these in a recent remodel. They get noticed and complemented often. Love them.
- AKAndrea K.Verified BuyerReviewingKLAS / Brass Mixed Dimmer Switch Outlet (2-Gang)I recommend this productRated 5 out of 5 stars1 month agoLuxury look and feel
I was very impressed with the product. It is a showpiece in my home that attracts a lot of compliments. The brass construction is solid and weighty, and the switch itself moves like a high quality stereo equipment knob. I will be buying more of these!
- JSJohn S.Verified BuyerReviewingKLAS / Brass Light Switch (3-Gang)I recommend this productRated 5 out of 5 stars1 month agoClassic Look
Excellent switches for my man cave and garage
- MSMary S.Verified BuyerReviewingKLAS / Brass Rotary Dimmer Switch (1-Gang)I recommend this productRated 5 out of 5 stars2 months agoAll in the details
These switches are the perfect finishing detail on my bathroom remodel. Smooth operation on the dimmers, Someone called them a tactile experience and I agree. Quality craftsmanship.
Ihre Fragen, unsere Antworten
Wie lange dauert die Fertigung eines individuellen Rahmens?
Individuelle Rahmen werden auf Bestellung gefertigt. Die Lieferzeit hängt von der Konfiguration ab; kontaktieren Sie uns, wenn Sie einen Liefertermin benötigen.
Für welchen Elektrostandard ist er ausgelegt?
KLAS-Rahmen sind für nordamerikanische Unterputzdosen ausgelegt. Wenn Sie ein UK- oder EU-Format benötigen, kontaktieren Sie uns vor der Bestellung.
Wie wird er montiert?
Ihr Rahmen wird mit eingebauten Elementen geliefert. Ein Elektriker schließt die Leitungen an, dann halten zwei Schrauben den Rahmen an der Unterputzdose. Schritt-für-Schritt-Anleitungen mit Anschlusstabellen: Schalterrahmen, Steckdosen und Dimmer.
Kann ich einen individuellen Rahmen zurückgeben?
Individuelle und auf Bestellung gefertigte Artikel sind von der Rückgabe ausgeschlossen. Zu unserer Rückerstattungsrichtlinie.
Kann ich die Oberfläche vor der Bestellung sehen?
Ja. Bestellen Sie eine KLAS Musterscheibe in einer beliebigen Oberfläche oder das komplette Set aller sechs und betrachten Sie sie in Ihrem eigenen Licht, bevor Sie Ihren Rahmen gestalten.